HTTP caching (第三篇)
send 套件的限制
send 套件,依照目前最新版本 v1.2.0,只能生成 Weak ETag,這部分似乎沒有在官方文件明講。於是我翻了 send 跟 etag 的實作,得出以下結論
- etag 套件有支援 Strong ETag 的生成
- etag 套件,若傳入的 entity 是 fs.Stats 物件,則預設就是 Weak ETag
- send 套件是使用 fs.Stats 來生成 ETag,且目前不支援
{ weak: false }的參數
send/index.js
if (this._etag && !res.getHeader("ETag")) {
  var val = etag(stat);
  debug("etag %s", val);
  res.setHeader("ETag", val);
}
etag/index.js
// support fs.Stats object
var isStats = isstats(entity)
var weak = options && typeof options.weak === 'boolean'
  ? options.weak
  : isStats

...

// generate entity tag
var tag = isStats
  ? stattag(entity)
  : entitytag(entity)

return weak
  ? 'W/' + tag
  : tag

/**
 * Generate a tag for a stat.
 *
 * @param {object} stat
 * @return {string}
 * @private
 */

function stattag (stat) {
  var mtime = stat.mtime.getTime().toString(16)
  var size = stat.size.toString(16)

  return '"' + size + '-' + mtime + '"'
}
ETag + If-None-Match
承接上一篇文章,我們新增以下 NodeJS 程式碼,並且使用 etag 套件來生成 Strong ETag
import { statSync } from "fs";
import { join } from "path";
import etag from "etag";

...

// ETag + If-None-Match
if (qsCase === "2") {
  const sendStream = send(req, url.pathname, {
    root: __dirname,
    etag: false,
    lastModified: true,
    cacheControl: true,
    maxAge: 5000,
    immutable: true,
  });
  res.setHeader("ETag", etag(statSync(join(__dirname, url.pathname)), { weak: false }))
  res.once("finish", () => {
    console.log("Response headers:", res.getHeaders());
    console.log("Status code:", res.statusCode);
  });
  sendStream.pipe(res);
  return;
}
瀏覽器輸入 http://localhost:8080/image.jpg?case=2&v=4 ,並且重整 4 次
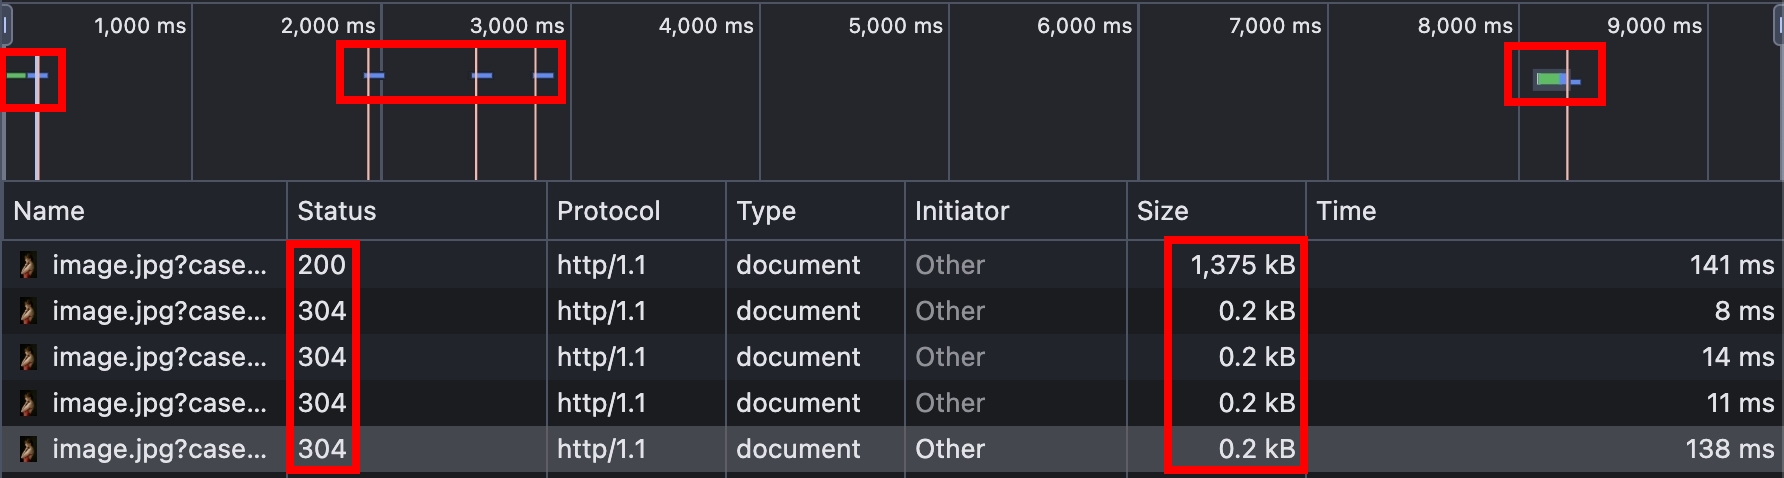
我們將上面的 5 個請求畫成時序圖
基本上跟 HTTP caching (第二篇) proxy_cache_revalidate 設定 的結果是差不多的,只差在
- Request 的
If-None-Match跟If-Modified-Since會一起出現 - Response 的
ETag跟Last-Modified會一起出現
如果一起出現的話,會優先使用 If-None-Match 跟 ETag 來進行比較,這部分可以看看 RFC 9110 的原文
A recipient MUST ignore If-Modified-Since if the request contains an If-None-Match header field; the condition in If-None-Match is considered to be a more accurate replacement for the condition in If-Modified-Since, and the two are only combined for the sake of interoperating with older intermediaries that might not implement If-None-Match.
Cache Busting
承接 Nginx 關於 proxy_cache_key 的預設值,是使用 $scheme$proxy_host$request_uri 的格式。換句話說,只要 $scheme$proxy_host$request_uri 改變了,就會新增一個 cache。利用這個概念延伸出來的概念,就叫做 Cache Busting。其實在前端開發的世界,這個概念已經不稀奇了,你我平常應該都會看到:
# timestamp
script.js?v=1752655998535

# file name hash
script-randomHash.js

# version in path
/react-dom@16/umd/react-dom.production.min.js
概念基本上就是 timestamp, hash, version,看要放在 path, query 還是 file name。這樣的做法,就可以確保若要更新前端使用到的資源(js, css, images...),不會被快取咬住,而是會去請求最新的資源。
proxy_cache 管理學問
Nginx 有一套機制管理、優化 proxy_cache,這邊大致列舉幾個:
proxy_cache_min_uses: 2;=> 兩個同樣的 request 才會把它加到 cache,確保這個資源是高頻訪問proxy_cache_valid 200 302 10m;=> 200 跟 302 status code 會被 cache 10 分鐘proxy_cache_path: ... inactive=60s=> cache 如果 60 秒都沒有被訪問,就會被刪除
當初在使用 Nginx proxy_cache 時沒有想太多,只是單純想測試。但沒想到要實作一個 proxy_cache 也是大有學問,不僅僅是要了解 HTTP Caching 跟 HTTP Conditional Requests 相關的 Headers,還要考量實務層面。學習 Nginx 關於 proxy_cache 相關的模組時,其實也會順便了解實務的應用場景,以及會遇到的問題。
proxy_cache_lock
在研究 Nginx proxy_cache 相關模組時,看到一個蠻感興趣的,官方文件的介紹如下:
To minimize the number of accesses to proxied servers when populating a new cache element, the proxy_cache_lock directive can be used.
想像一個搶購演唱會門票的網站,開放搶票的瞬間,會有大量的流量湧入,這些初始流量都吃不到 cache,就很有可能直接把 Origin Server 打爆。解決這個問題的辦法也很簡單,就是讓第一個請求先到 Origin Server,等到回來 Nginx 這邊設好 cache 以後,後面的請求就可以全部回傳 304,這樣 Origin Server 就只會收到一個請求
我們實測看看,在 nginx.conf 新增以下設定,並且重啟
location / {
    proxy_cache_lock on;
    ...
}
瀏覽器打開 http://localhost ,Disable Cache 勾選,並且在 F12 > Network 輸入
const url = "http://localhost/image.jpg?case=1&v=19";
fetch(url);
fetch(url);
fetch(url);
fetch(url);
fetch(url);
fetch(url);
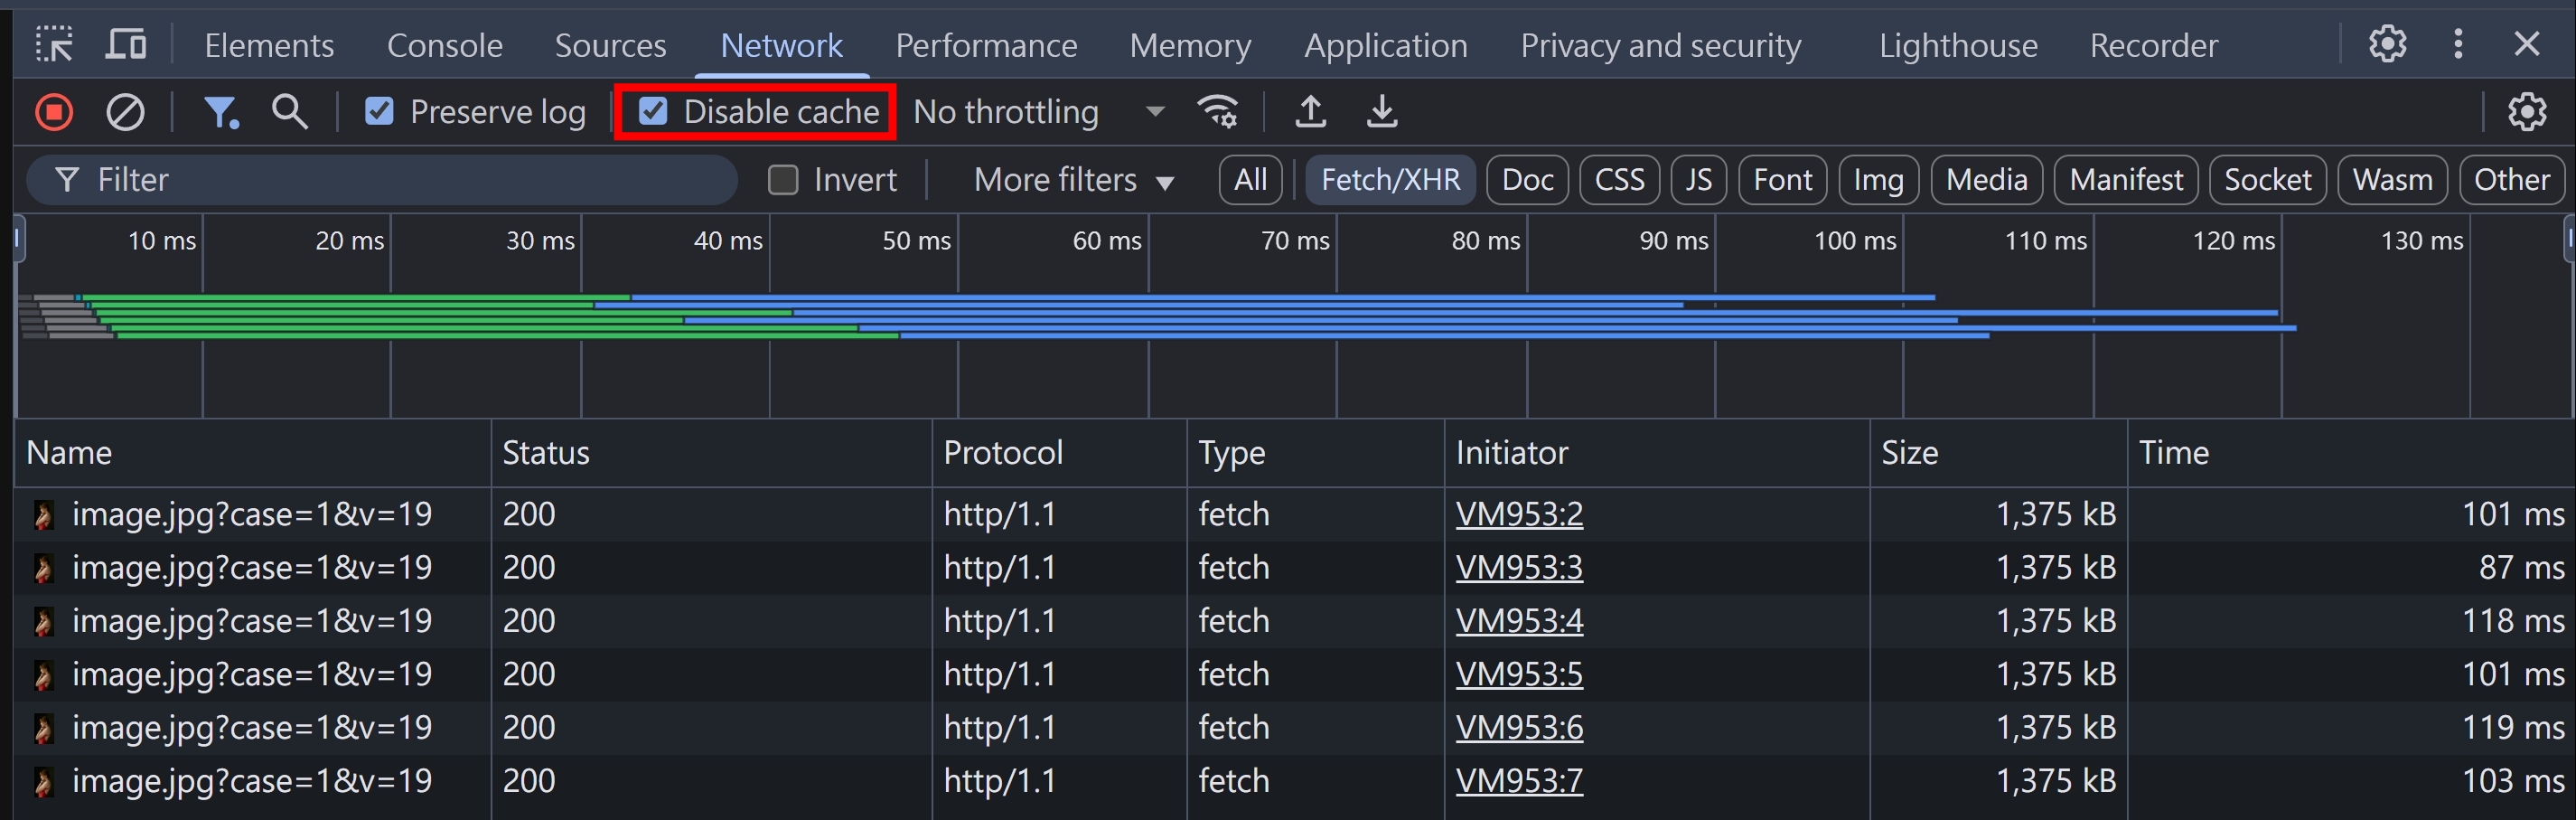
觀察 NodeJS 的 log,確實只有一個請求,Nginx 幫 Origin Server 擋掉了超多請求的!
Request url: /image.jpg?case=1&v=19
Request headers: {
  'cache-control': 'no-cache',
  ...
}
Response headers: [Object: null prototype] {
  'cache-control': 'public, max-age=5, immutable',
  'last-modified': 'Thu, 27 Feb 2025 14:07:46 GMT',
  'content-type': 'image/jpeg',
  'content-length': 1374458
}
Status code: 200
Vary
微尷尬的一個 Response Header,雖然立意良善,但是實務上的使用情境不多~這本來應該是要在 HTTP content negotiation 的篇章講到,但實際上又會牽扯到 cache,所以就統一在這邊帶過
以 HTTP content negotiation - NodeJS HTTP Server + negotiator 實作 為例,Server 會根據不同的 Accept 以及 Accept-Language 回傳不同的資源,在這個情況,其實應該加上
res.setHeader("Vary", "Accept, Accept-Language");
但是,就像我們在 Cache Busting 提到的,Nginx 預設的 cache key 是 $scheme$proxy_host$request_uri,如果用這個 cache key 的話,就會導致不同語系跟不同 Content-Type 的資源都被寫入同一個 cache,除非要把 Vary 也加入 cache key 的格式,但就要再額外設定。實務上,通常會直接用 URL 切開,可參考 HTTP content negotiation - Accept-Language & Content-Language 實務 的範例
X-Cache-Status
實務上,為了監控 cache 狀態,常常會在 response header 加上 X-Cache-Status,在 Cloudfare 的架構下叫做 CF-Cache-Status,但基本上就同樣概念。Nginx 也有支援,設定如下:
location / {
    ...
    add_header X-Cache-Status $upstream_cache_status;
}
支援以下七種值
- MISS => 第一次請求,Nginx 還沒有 cache
- BYPASS => 須設定 proxy_cache_bypass 才會看到
- EXPIRED => 快取過期,直接跟 Origin Server 請求新的資源
- STALE => 須設定 proxy_cache_use_stale 才會看到
- UPDATING => 須設定
proxy_cache_use_stale updating;才會看到,概念跟 Cache-Control: stale-while-revalidate 類似,cache 過期後,先回傳 stale resource,然後再跟 Origin Server 重新驗證 - REVALIDATED => Conditional Request 成功
- HIT => 命中 cache
小結
Cache 是一個很大的主題,分了三篇才講完,實際上還有很多內容可以深入研究跟測試,不過我想,這三篇文章已經涵蓋了大部分的使用情境了~
參考資料
- https://developer.mozilla.org/en-US/docs/Web/HTTP/Guides/Caching
- https://developer.mozilla.org/en-US/docs/Web/HTTP/Reference/Headers/Cache-Control
- https://developer.mozilla.org/en-US/docs/Web/HTTP/Reference/Headers/Expires
- https://developer.mozilla.org/en-US/docs/Web/HTTP/Reference/Headers/Last-Modified
- https://developer.mozilla.org/en-US/docs/Web/HTTP/Reference/Headers/ETag
- https://developer.mozilla.org/en-US/docs/Web/HTTP/Reference/Headers/Vary
- https://developer.mozilla.org/en-US/docs/Web/HTTP/Reference/Headers/Pragma
- https://developer.mozilla.org/en-US/docs/Web/HTTP/Reference/Headers/Age
- https://developer.mozilla.org/en-US/docs/Web/HTTP/Reference/Status/304
- https://datatracker.ietf.org/doc/html/rfc9111
- https://nginx.org/en/docs/http/ngx_http_proxy_module.html#proxy_cache_key
- https://nginx.org/en/docs/http/ngx_http_proxy_module.html#proxy_cache_path
- https://nginx.org/en/docs/http/ngx_http_proxy_module.html#proxy_cache
- https://nginx.org/en/docs/http/ngx_http_proxy_module.html#proxy_set_header