Transfer-Encoding
Transfer-Encoding: chunked
HTTP/1.1 的世界,新增了 Transfer-Encoding: chunked 的概念,允許 request.body 或是 response.body 分塊傳輸
格式如下:
<byteLengthInHex>CRLF
<Data>CRLF
<byteLengthInHex>CRLF
<Data>CRLF
<byteLengthInHex>CRLF
<Data>CRLF
0CRLFCRLF
範例:
a\r\n
first line\r\n
b\r\n
second line\r\n
a\r\n
third line\r\n
0\r\n\r\n
使用 NodeJS 實作 Transfer-Encoding: chunked
我們來看看 NodeJS HTTP 模組,什麼時候會開啟 Transfer-Encoding: chunked 傳輸:
- 根據 NodeJS 官方文件描述
https://nodejs.org/api/http.html#responsewritechunk-encoding-callback
The first time response.write() is called, it will send the buffered header information and the first chunk of the body to the client.
- 根據 NodeJS 原始碼
https://github.com/nodejs/node/blob/main/lib/_http_outgoing.js#L105
function OutgoingMessage(options) {
  // other code
  this.useChunkedEncodingByDefault = true;
}
我們使用 NodeJS HTTP 模組來實作:
import httpServer from "../httpServer";
import { faviconListener } from "../listeners/faviconListener";
import { notFoundListener } from "../listeners/notFoundlistener";

const firstline = "firstline~~~";
const secondline = "secondline~~~";
const thirdline = "thirdline~~~";

httpServer.on("request", function requestListener(req, res) {
  if (req.url === "/favicon.ico") return faviconListener(req, res);
  if (req.url === "/case1") {
    // res.write 會自動幫忙處理 transfer-encoding:chunked 的格式
    res.write(firstline);
    res.write(secondline);
    res.end(thirdline);
    return;
  }
  return notFoundListener(req, res);
});
然後使用瀏覽器打開 http://localhost:5000/case1
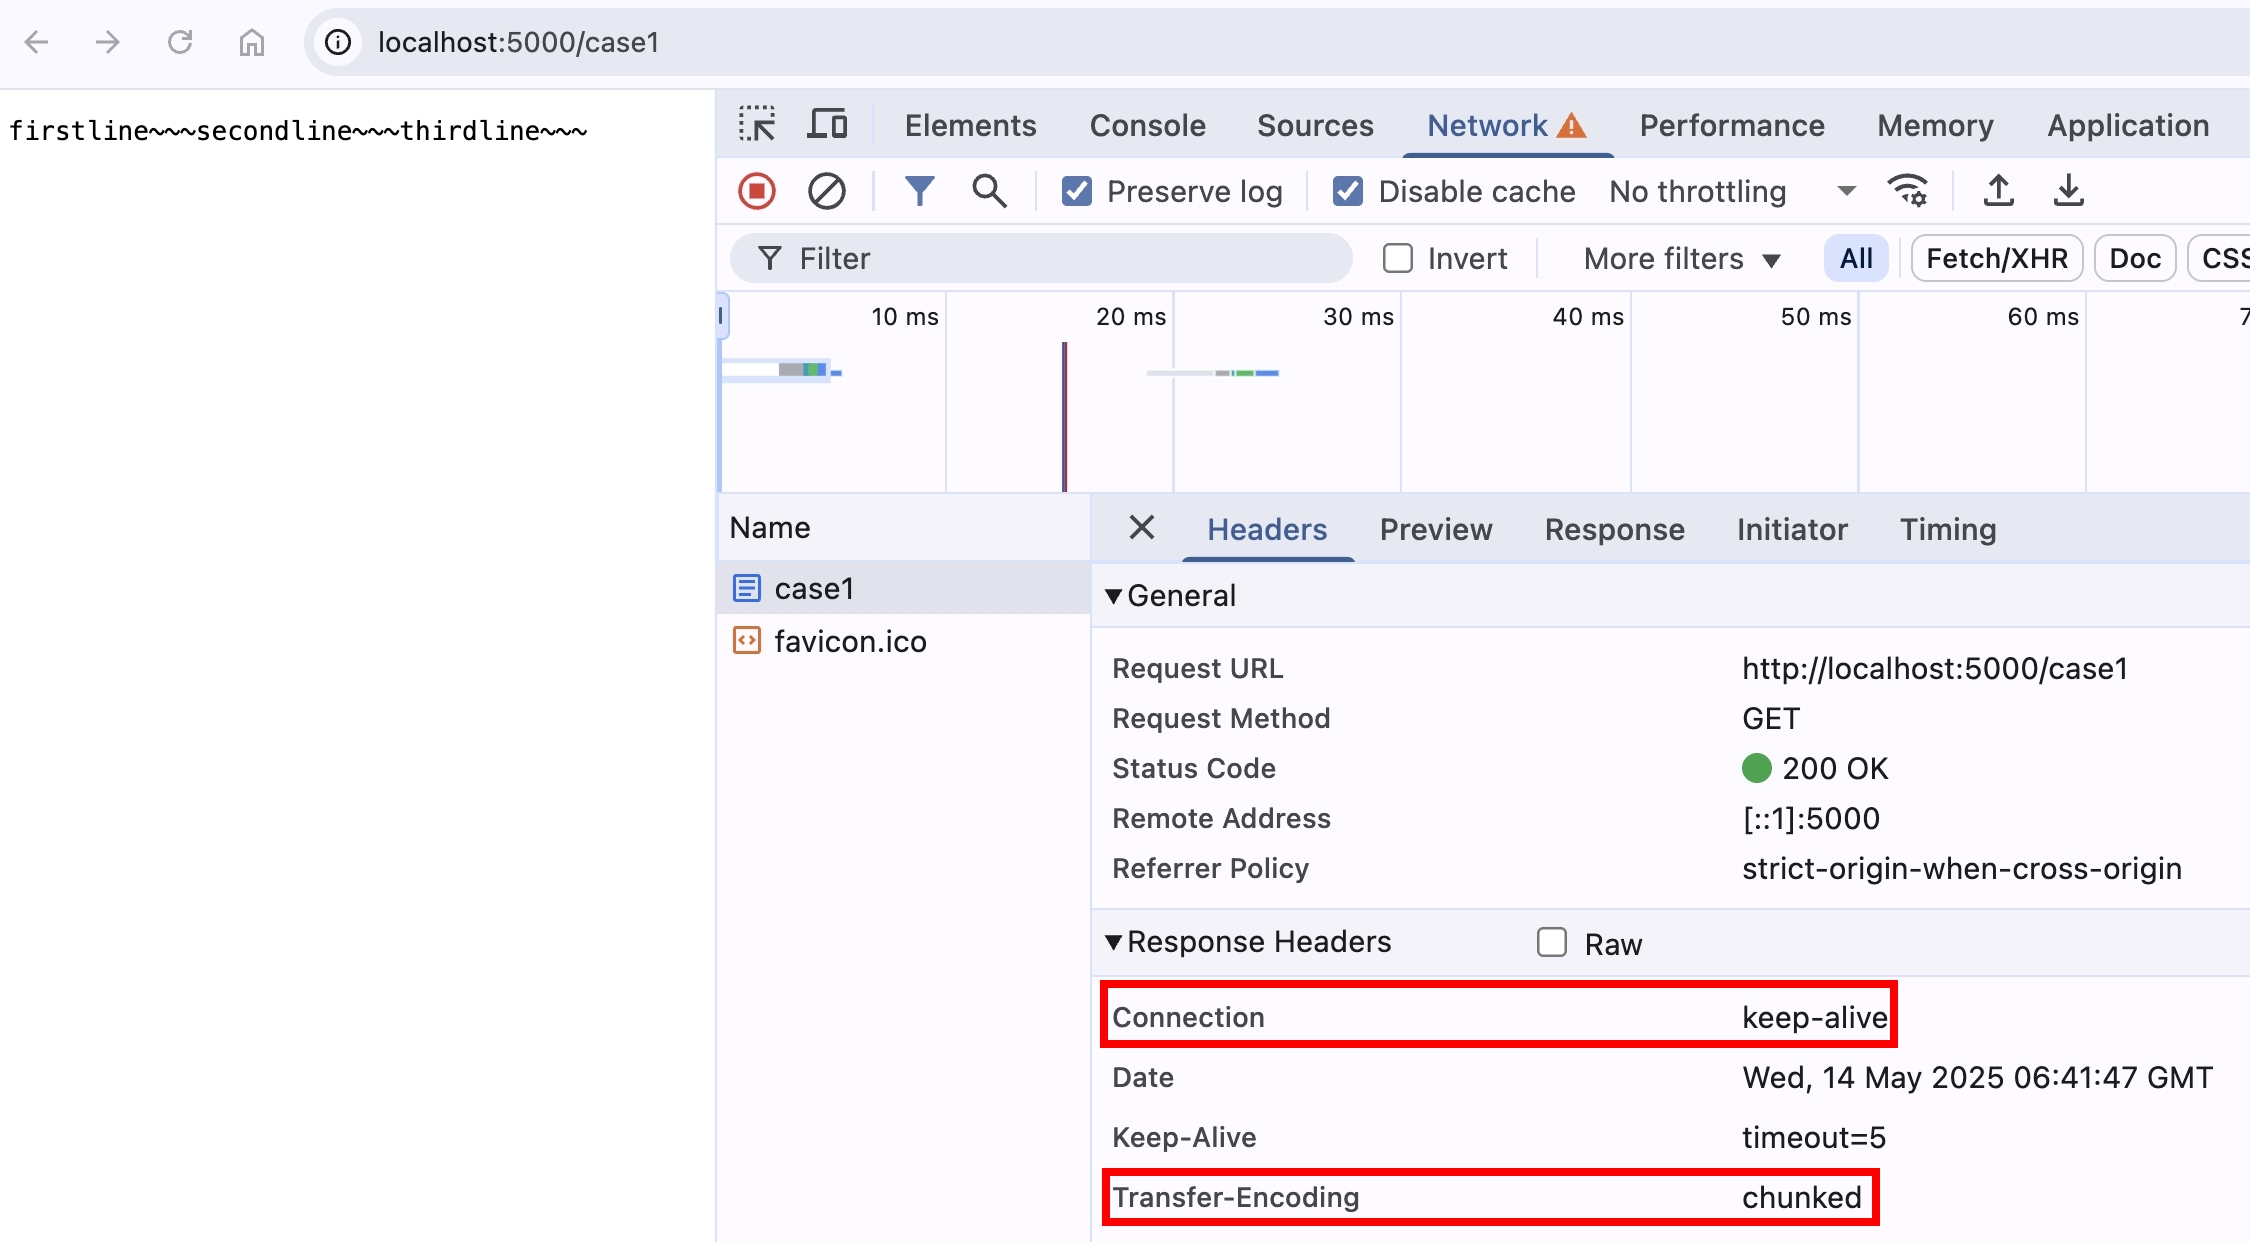
res.write 底層,會處理 \r\n 以及計算資料 byte length 的邏輯,所以只需寫入資料即可
使用 Socket.write 自行處理資料格式
為了讓大家對 chunked encoding 的資料格式更熟悉,我們接著使用 Socket.write 來寫入 raw HTTP Response Body
if (req.url === "/case2") {
  // 先送 header 出去
  res.setHeader("transfer-encoding", "chunked");
  res.flushHeaders();

  // 使用 socket.write 自行處理 transfer-encoding: chunked 的格式
  res.socket?.write(
    `${Buffer.byteLength(firstline).toString(16)}\r\n${firstline}\r\n`,
  );
  res.socket?.write(
    `${Buffer.byteLength(secondline).toString(16)}\r\n${secondline}\r\n`,
  );
  res.socket?.write(
    `${Buffer.byteLength(thirdline).toString(16)}\r\n${thirdline}\r\n`,
  );
  res.socket?.end("0\r\n\r\n");
  return;
}
然後使用瀏覽器打開 http://localhost:5000/case2

可以看到結果跟上面使用 res.write 是一樣的
那如果格式錯誤呢?我們故意把其中一個 \r\n 拿掉
res.socket?.write(
  `${Buffer.byteLength(firstline).toString(16)}\r\n${firstline}`,
);
用瀏覽器打開 http://localhost:5000/case2
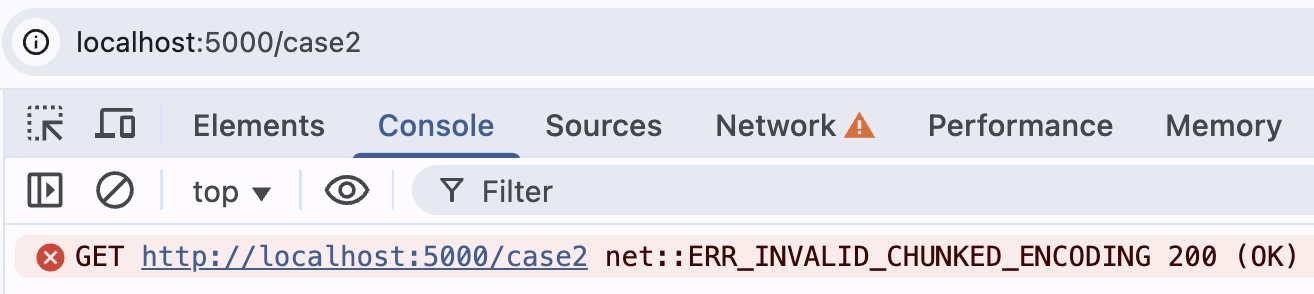
瀏覽器就會噴 ERR_INVALID_CHUNKED_ENCODING 的錯誤,代表瀏覽器底層會去解析這個資料,整理完才會顯示給使用者
Transfer-Encoding: chunked + Content-Length
上面的範例,在 Transfer-Encoding: chunked 的情況,NodeJS HTTP 模組預設都不會傳送 Content-Length 的 Response Header
所以這兩個 header 是可以一起傳送的嗎?我們調整上面的程式碼
if (req.url === "/case3") {
  const contentLength =
    Buffer.byteLength(firstline) +
    Buffer.byteLength(secondline) +
    Buffer.byteLength(thirdline);
  res.setHeader("Content-Length", contentLength);
  res.setHeader("Transfer-Encoding", "chunked");
  res.write(firstline);
  res.write(secondline);
  res.end(thirdline);
  return;
}
用瀏覽器打開 http://localhost:5000/case3 ,一切相安無事

如果故意傳送大於資料長度的 Content-Length 呢?
if (req.url === "/case3") {
  res.setHeader("Content-Length", 100);
  res.setHeader("Transfer-Encoding", "chunked");
  res.write(firstline);
  res.write(secondline);
  res.end(thirdline);
  return;
}
可以看到瀏覽器是相安無事

為什麼會這樣呢?我們來看看 RFC 9112 的定義
https://datatracker.ietf.org/doc/html/rfc9112#section-6.1-15
A server MAY reject a request that contains both Content-Length and Transfer-Encoding or process such a request in accordance with the Transfer-Encoding alone.
https://datatracker.ietf.org/doc/html/rfc9112#section-6.2-2
A sender MUST NOT send a Content-Length header field in any message that contains a Transfer-Encoding header field.
https://datatracker.ietf.org/doc/html/rfc9112#section-6.3-2.3
If a message is received with both a Transfer-Encoding and a Content-Length header field, the Transfer-Encoding overrides the Content-Length.
簡單來說,不允許兩個 header 一起設置,但當兩個 header 同時設置時,接收方可選擇回傳錯誤訊息,或是把 Content-Length 捨棄,咱們的 Chrome 瀏覽器選擇了後者。
使用 curl 觀察 raw HTTP Response Body
由於瀏覽器已經把 Response Body 都整理好,才呈現給使用者看,但我們要怎麼確定傳輸的格式真的是
<byteLengthInHex>CRLF
<Data>CRLF
<byteLengthInHex>CRLF
<Data>CRLF
<byteLengthInHex>CRLF
<Data>CRLF
0CRLFCRLF
我們打開終端機,輸入 curl --raw http://localhost:5000/case2,可以看到結果如下
c
firstline~~~
d
secondline~~~
c
thirdline~~~
0
- c = 十進位的 12,等於
firstline~~~的 byte length - d = 十進位的 13,等於
secondline~~~的 byte length - c = 十進位的 12,等於
thirdline~~~的 byte length - 結尾也符合
0\r\n\r\n
其中 --raw 參數的定義如下
When --raw is used, it disables all internal HTTP decoding of content or transfer encodings and instead makes curl passed on unaltered, raw, data.
Transfer-Encoding: chunked 搭配 Content-Type: application/json
chunked 的資料除了 text/plain 純文字,也可以是其他類型的,我們使用 application/json 來當範例
// chunked with application/json
if (req.url === "/case4") {
  const chunkSplitIndex = 20;
  const jsonString = JSON.stringify({
    id: 123,
    name: "456",
    age: 18,
    email: "example@gmail.com",
  });
  res.setHeader("Content-Type", "application/json");
  // res.write 會自動幫忙處理 transfer-encoding:chunked 的格式
  res.write(jsonString.slice(0, chunkSplitIndex));
  res.end(jsonString.slice(chunkSplitIndex));
  return;
}
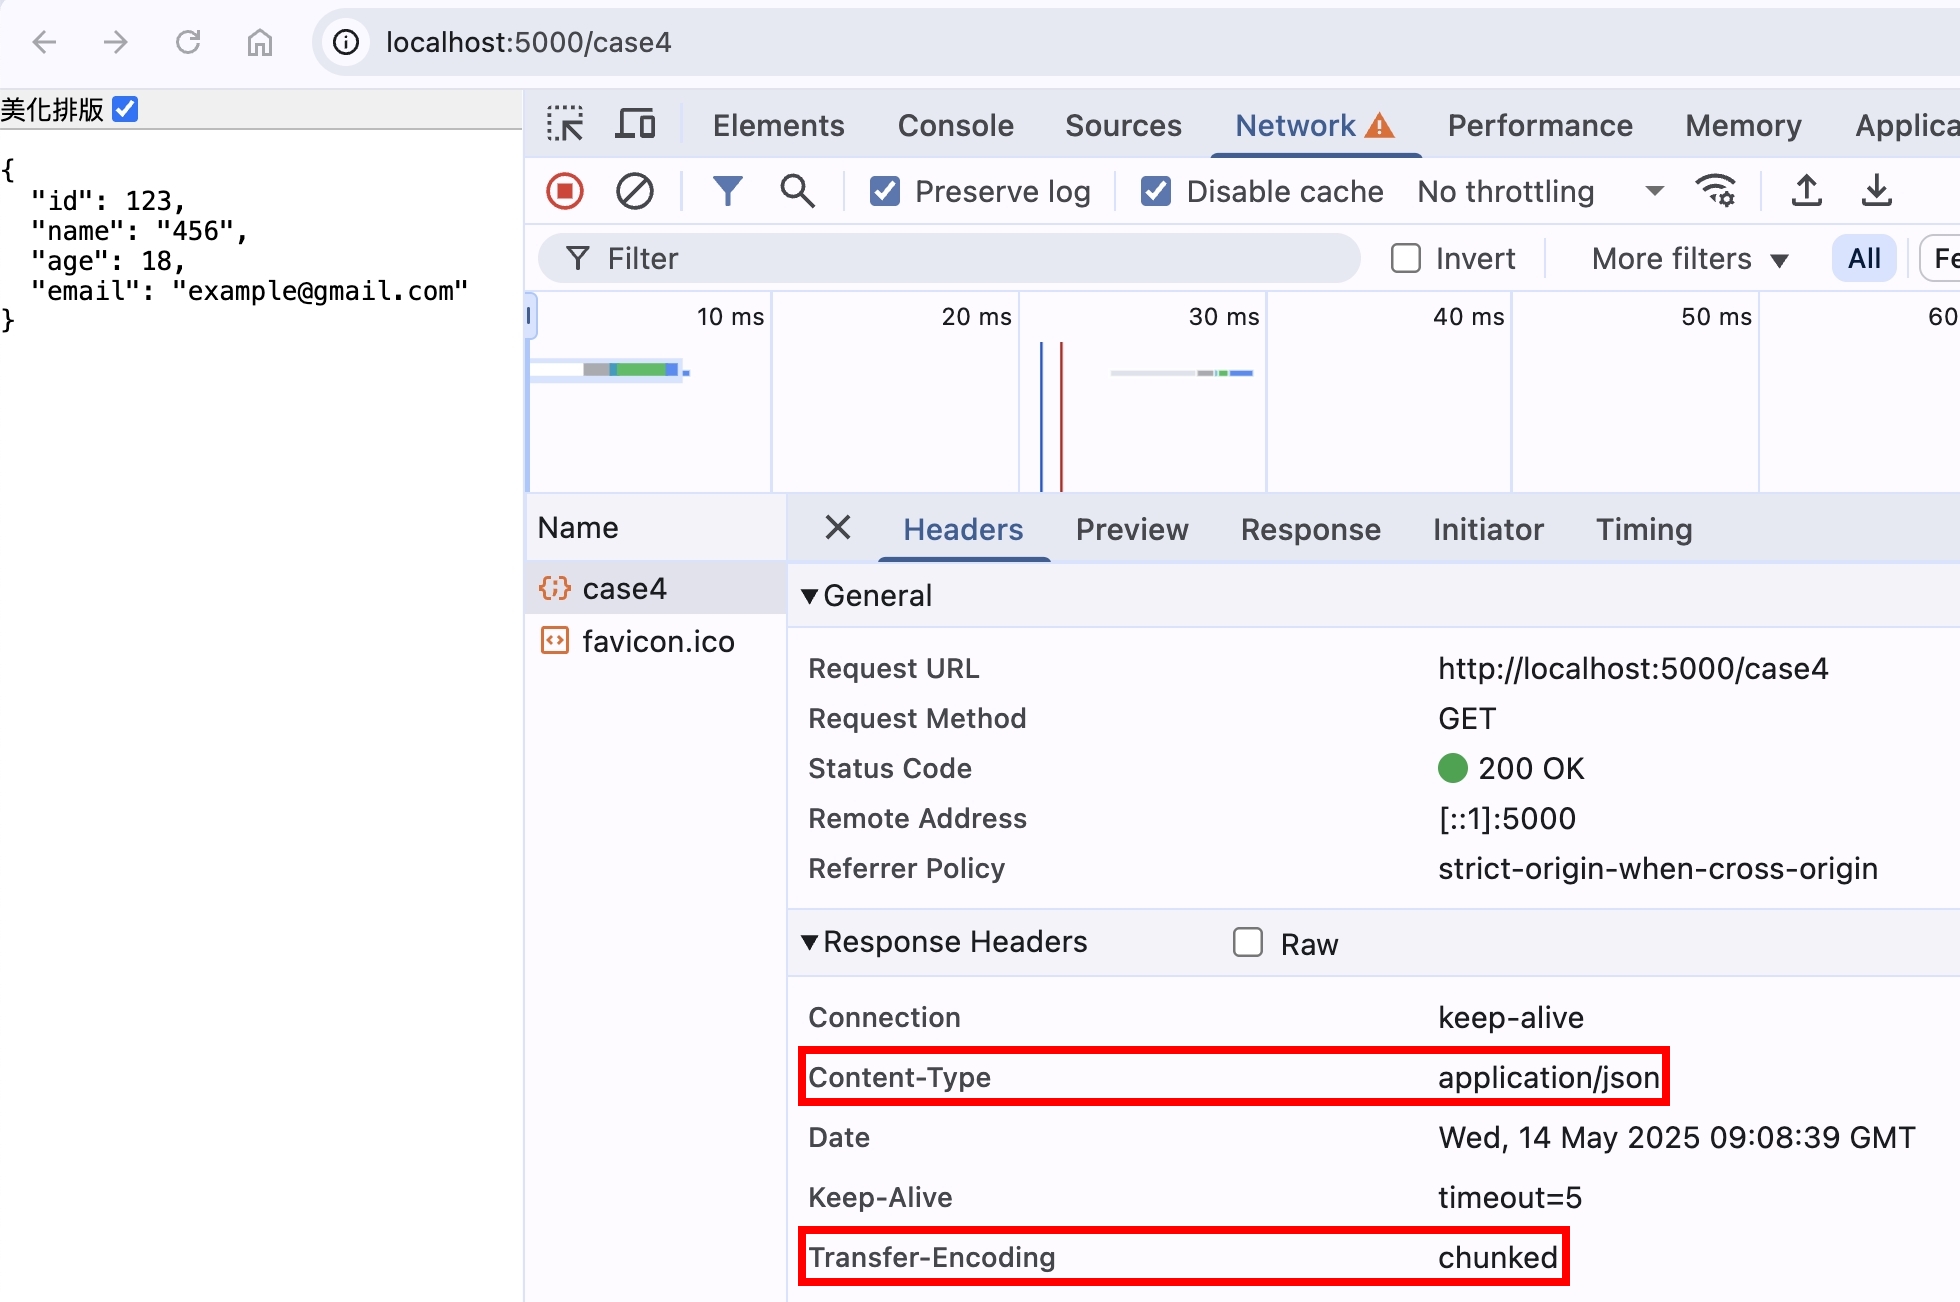
用瀏覽器打開 http://localhost:5000/case4 ,可以看到正確解析成 json
終端機輸入 curl --raw http://localhost:5000/case4
14
{"id":123,"name":"45
28
6","age":18,"email":"example@gmail.com"}
0
- 14 = 十進位的 20,等於
{"id":123,"name":"45的 byte length - 28 = 十進位的 40,等於
6","age":18,"email":"example@gmail.com"}的 byte length - 結尾也符合
0\r\n\r\n
ReadableStream,讓你分塊讀取 Response Body
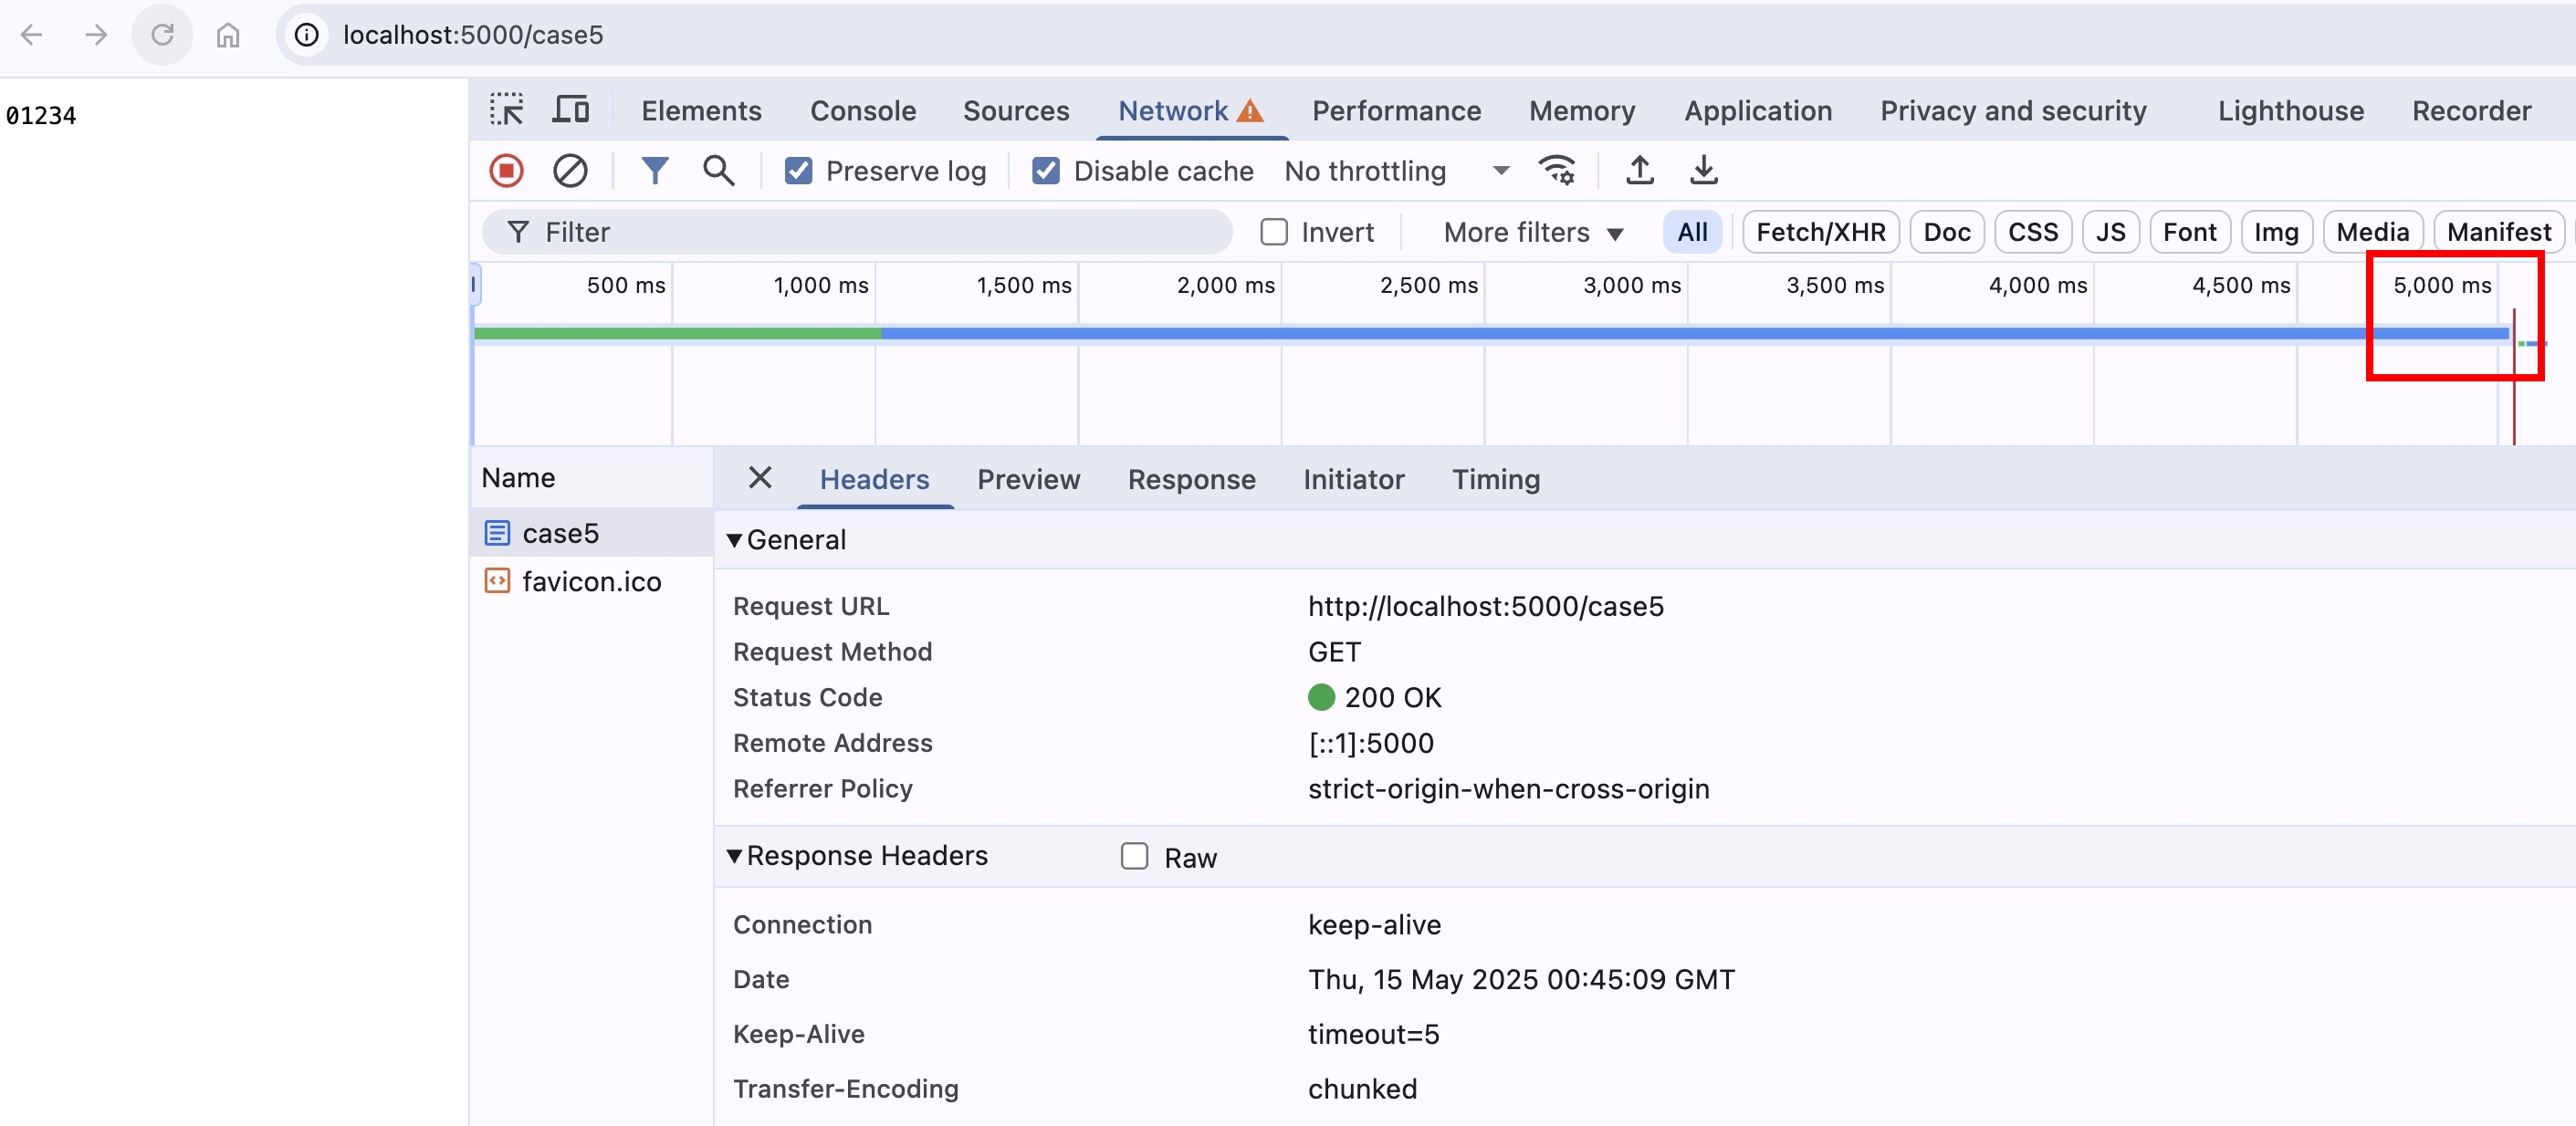
當資料量很大時,雖然資料是分塊傳輸,但瀏覽器會等到所有資料都收到,才顯示給前端,在使用者體驗上就比較差
我們使用 setTimeout 來模擬 Server 處理時間
// chunked with slow data transfer
if (req.url === "/case5") {
  let index = 0;
  const maxIndex = 5;
  const interval = setInterval(() => {
    res.write(index.toString());
    index += 1;
    if (index === maxIndex) {
      clearInterval(interval);
      res.end();
    }
  }, 1000);
  return;
}
用瀏覽器打開 http://localhost:5000/case5 ,會發現要等 5 秒才會看到結果
使用瀏覽器原生的 fetch 時,大家平常都是這樣寫
fetch("URL")
  .then((response) => response.json())
  .then((json) => console.log(json));
若仔細研究 response 物件,會發現 response.body 是 ReadableStream
我們可以利用 ReadableStream 來達成分塊讀取 Response Body 的功能
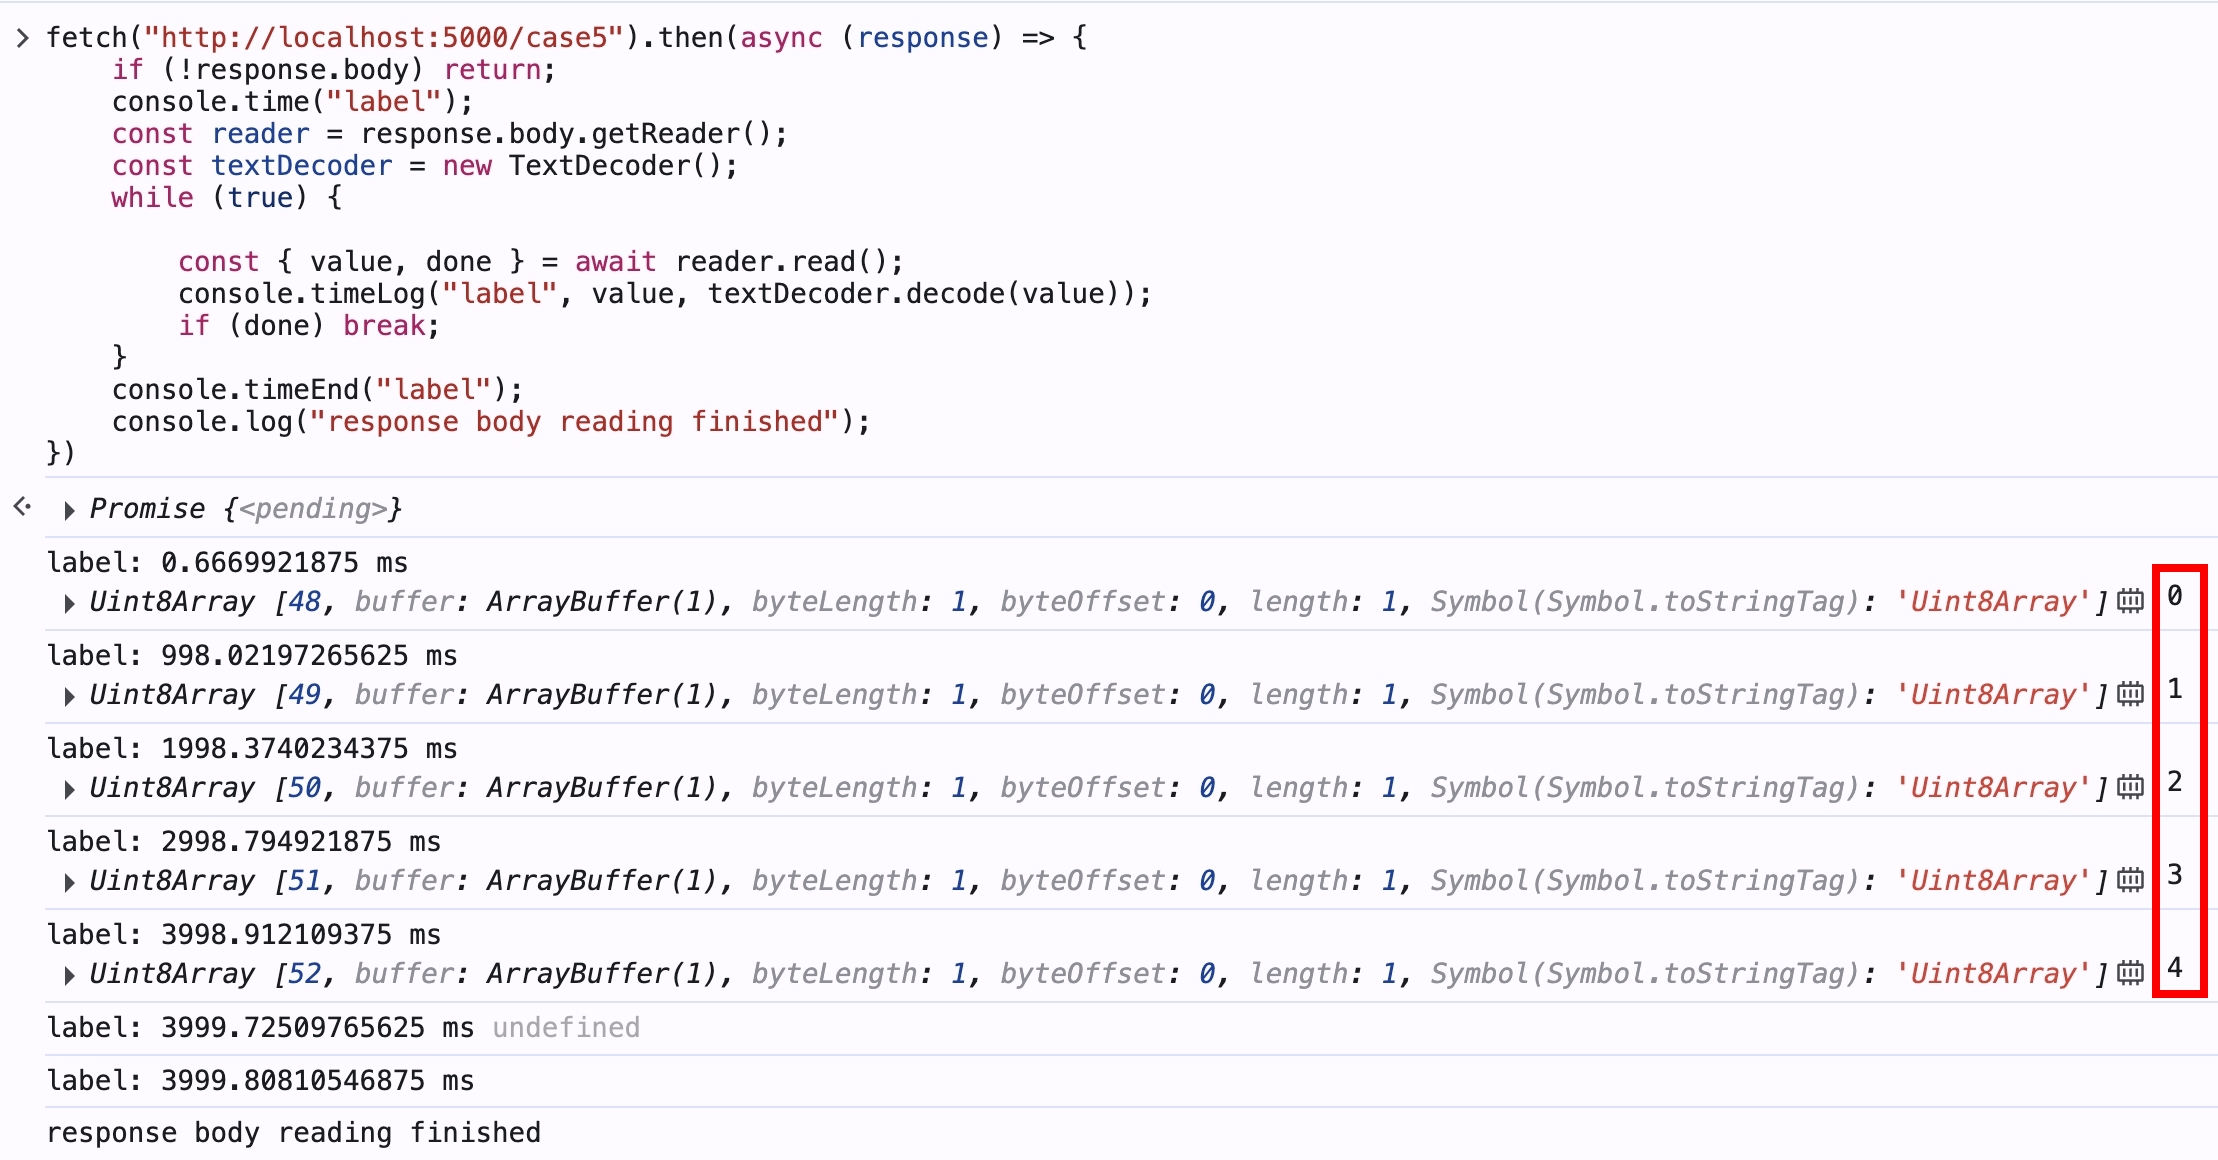
Transfer-Encoding: chunked + Connection: closed
如果設定 Connection: closed 的話,還可以正常接收 chunk 嗎?
// chunked with connection: close
if (req.url === "/case6") {
  // 先傳送 headers
  res.setHeaders(
    new Headers({
      Connection: "closed",
      "Content-Type": "text/plain",
      "Transfer-Encoding": "chunked",
    }),
  );
  res.flushHeaders();

  // 過 N 秒再回傳 body
  setTimeout(() => res.end("hello world"), 3000);
  return;
}
用瀏覽器打開 http://localhost:5000/case6 ,還是有正常收到資料
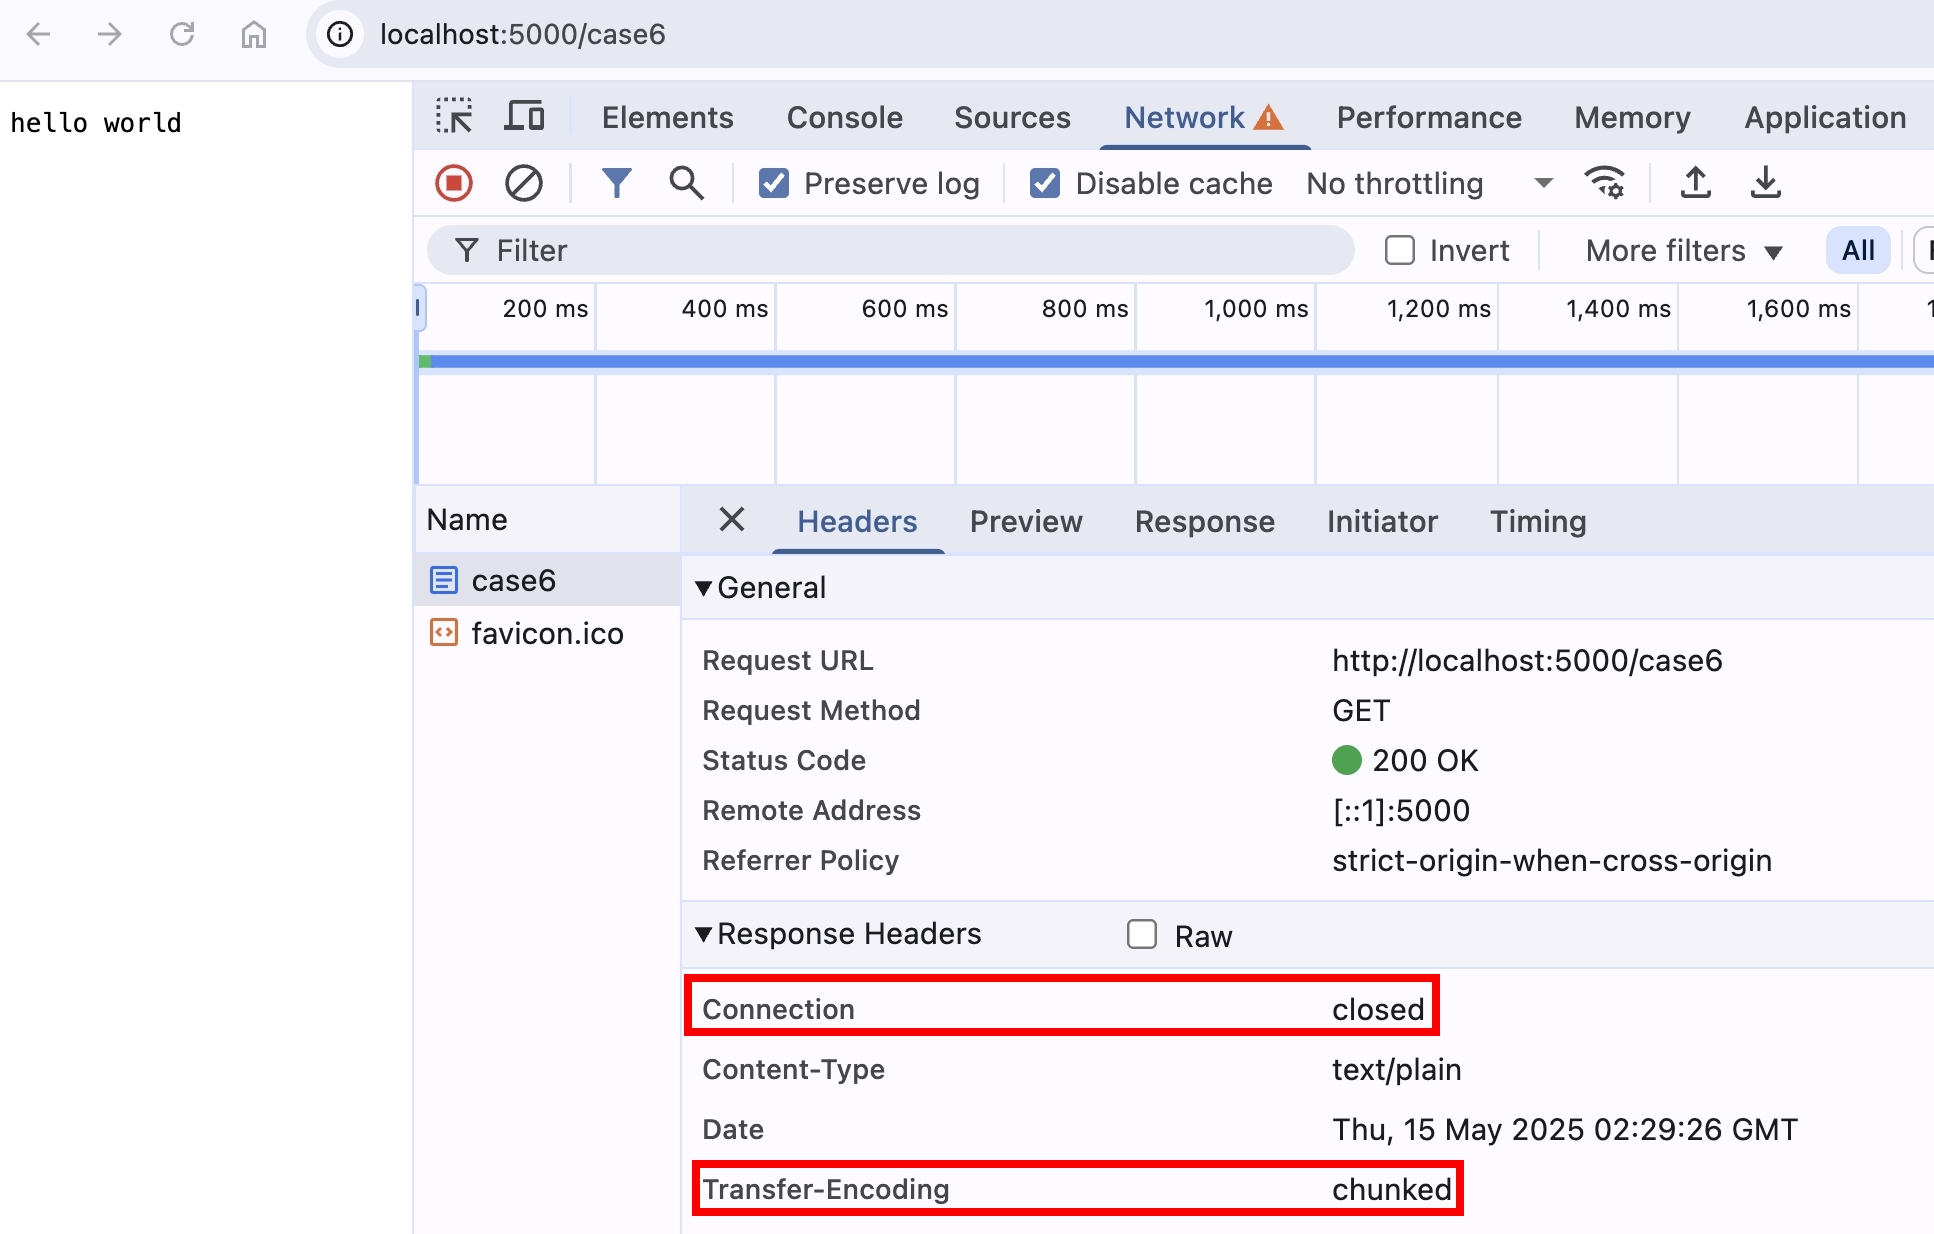
因為 Connection: closed 指的是在這次 HTTP 來回的傳輸完畢之後,才關閉 TCP Connection,並不是 Response Header 傳輸完畢之後就直接關閉了,這兩者之間是有差異的。
跟 Server Sent Events 的差別
在研究 Transfer-Encoding: chunked 的時候,我一直覺得這跟 SSE 的概念很像,後來才發現,其實 SSE 就是 Transfer-Encoding: chunked + 把 Response Body 按照指定的文本格式包裝~
兩者的應用情境略有不同,差異如下:
| Transfer-Encoding: chunked | Server Sent Events | |
|---|---|---|
| Content-Type | 任何 | text/event-stream |
| 主要用途 | 任意長度的資料傳輸(不限型別) | 向瀏覽器單向推播文字資料(通常是事件/訊息) |
| 使用場景 | 文件下載、API 回應分段等 | 即時通知、即時資料更新(像股價、聊天訊息) |
| 瀏覽器 EventSource 支援 | ❌ | ✅ |
| retry | ❌ | ✅ |
| eventType | ❌ | ✅ |
Transfer-Encoding vs Content-Encoding
實務上,瀏覽器到 Server 中間可能會經過很多節點,例如 Client <=> Proxy Server <=> CDN <=> Actual Server
Transfer-Encoding 是指相鄰兩個節點之間的傳輸方式,並不代表最終到 Client 或 Actual Server 需要用此方式傳輸
而 Content-Encoding 則是 End-to-end headers,代表這個 header 一定要傳到最後的接收者
| Transfer-Encoding | Content-Encoding | |
|---|---|---|
| 可否與 Content-Length 並用 | 當使用 chunked 時,❌ | ✅ |
| 是否為 End-to-end headers | ❌ | ✅ |
參考資料
- https://developer.mozilla.org/en-US/docs/Web/HTTP/Reference/Headers/Transfer-Encoding
- https://datatracker.ietf.org/doc/html/rfc9112#name-chunked-transfer-coding
- https://httpwg.org/specs/rfc9112.html#field.transfer-encoding
- https://everything.curl.dev/usingcurl/downloads/raw.html
- https://developer.mozilla.org/en-US/docs/Web/API/Response/body
- https://developer.mozilla.org/en-US/docs/Web/API/ReadableStream
- https://developer.mozilla.org/en-US/docs/Web/API/ReadableStreamDefaultReader
- https://developer.mozilla.org/en-US/docs/Web/API/ReadableStreamDefaultReader/read